
A bicycle inspection should answer one commercial question: does this shipment match the order you approved, with enough evidence to support a release decision? A photograph of finished bicycles cannot answer that alone. Importers need traceable specifications, a defined inspection scope, recorded findings and a process for closing defects before loading.
This guide is for wholesalers, distributors and private-label buyers ordering conventional bicycles. It is written for container and bulk orders, not for individual purchases, and we do not supply single bicycles. It covers practical checks around shipment release, including carton-packed bicycles that require final assembly at destination. Electric bicycles need an additional inspection plan for their electrical system and battery; those checks are outside this guide.
Use the checklist with your purchase order, approved sample and product-specific instructions. Treat the numerical examples below as planning illustrations, not BOLUN production data, promised defect rates or universal acceptance limits.
1. Freeze the specification before booking bicycle inspection
A bicycle inspection cannot resolve an order that has three different specifications. Create one approved reference pack and assign a revision number. Include the purchase order, bill of materials, color references, artwork, packaging instructions and any written approvals for changes.
Identify parts precisely enough to detect substitutions. “Disc brake” does not identify the agreed brake system. “Alloy frame” does not establish the frame dimensions, finish or approved construction. Record the specified manufacturer and model where applicable, together with the dimensions and interfaces that affect assembly and replacement.
Your bicycle inspection reference pack should distinguish contractual requirements from preferences. A requested color sample, for example, needs an agreed comparison method and tolerance. Otherwise, a late disagreement can become a negotiation about taste instead of a documented nonconformity.
Before production, use this OEM bicycle inquiry guide to organize the model, quantity, market and branding details that belong in the reference pack.
2. Define the lot and sampling rules
Record what is actually ready: finished units, packed units, model quantities and the location of any unfinished goods. Do not label a partially available order as a completed shipment. Schedule bicycle inspection with time for correction and a second check before the agreed loading deadline.
For a mixed order, make the model, size and color breakdown visible. An illustrative order of 300 bicycles might contain 120 units of one model, 100 of another and 80 of a third. Sampling only the first accessible model leaves the other two configurations unexamined.
Agree who selects cartons and how samples represent the defined lots. If an acceptance-sampling system is used, specify its edition, inspection level, applicable sampling regime and acceptance/rejection rules in advance. ISO publishes ISO 2859-1:2026 for attribute-based acceptance sampling. Its tables and application rules should be used by a competent inspection provider; a round percentage chosen for convenience is not an equivalent sampling plan.
Passing a sample does not prove that every bicycle is defect-free. Keep safety-related requirements and any required individual checks explicit. Your bicycle inspection agreement should explain what happens when a potentially dangerous defect is discovered.
3. Match the physical goods to the order
Start bicycle inspection with identification and quantity before detailed functional checks. Record model codes, size labels, colors, carton numbers and batch identifiers where available. Compare them against the approved order and packing list, not an older quotation.
Use this bicycle inspection worksheet to connect each check with evidence and a release decision:
| Check area | Compare against | Evidence to retain | Action if different |
|---|---|---|---|
| Model and quantity | Purchase order and packing list | Count record and carton references | Reconcile the discrepancy |
| Components | Approved bill of materials | Identifiable part photographs | Hold unapproved substitutions |
| Finish and decals | Approved sample and artwork | Close-up and context photographs | Classify against agreed criteria |
| Assembly and function | Model-specific instructions | Measurements and functional records | Isolate and correct affected goods |
| Accessories and manuals | Approved packing specification | Unpacked contents photograph | Complete missing items |
| Cartons and labels | Approved packaging files | Dimensions, weight and label checks | Correct before release |
A changed part may look similar while requiring a different replacement stock item. Ask for written approval of substitutions before shipment, including the effect on servicing, manuals and spare-part compatibility.
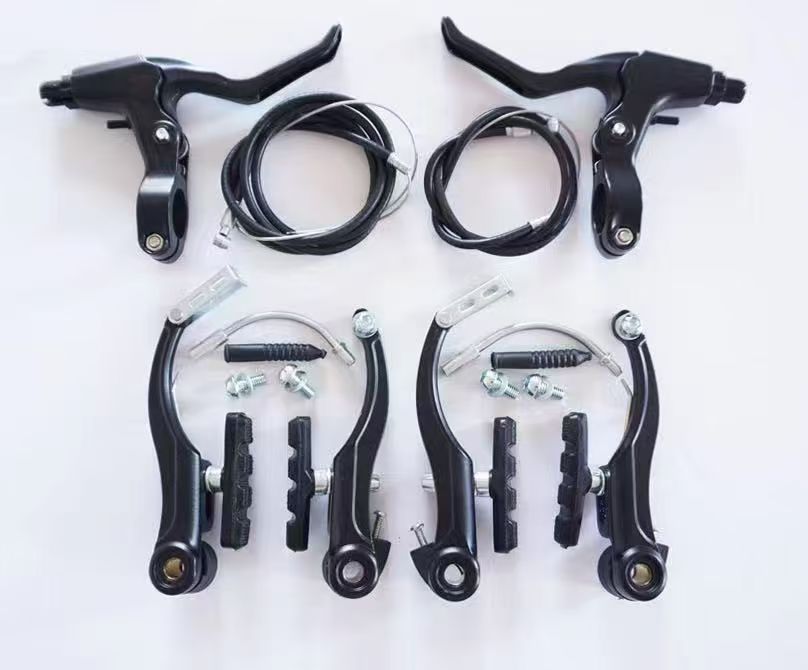
Compare the brake levers, cables, brake arms and fittings with the approved component list.
4. Check frames, forks and finish without overstating the result
Look for visible damage, distortion, corrosion, missing finish and contact marks. Photograph the affected location and its position on the bicycle. Compare paint, decal placement and protection with the approved reference rather than accepting a photograph taken from several metres away.
For bicycle inspection records, write measurable descriptions where possible. “Scratch on left chainstay, location shown in photograph 14” is more useful than “paint problem.” Use the agreed cosmetic criteria to decide severity instead of inventing a universal scratch allowance after the goods are made.
Visual checking cannot establish internal weld quality or fatigue performance. Product testing and compliance evidence require their own scope and competent assessment. Do not describe a clean-looking frame as certified, and do not use an unrelated model’s test report as proof for the shipment.
5. Verify assembly and basic function
Assign functional checks to a competent bicycle technician following the exact model and component instructions. Record which checks are possible in the shipped assembly state and which require a sampled unit to be assembled first.
The bicycle inspection plan should cover wheel retention, steering movement, brake operation, drivetrain function and the security of relevant fitted components. Record the specified method and result, including any instruments used. Avoid a single generic tightening value for unrelated bolts or components.
For brakes, verify the agreed type and installation, then evaluate operation according to the applicable instructions. A wheel that turns freely on a stand does not establish loaded braking performance. Likewise, a short demonstration video does not replace the agreed functional or product tests.
For reference, the Trek bicycle owner’s manual explains the importance of checks such as wheel attachment and correct component tightening. It is an example of manufacturer guidance, not a specification for BOLUN bicycles. Use the instructions supplied for the actual components in your order.
When bicycles ship partly disassembled, your bicycle inspection record should identify the buyer’s remaining assembly tasks. Confirm the required instructions, small parts and tools arrangement so distributors can plan competent final assembly at destination.
6. Inspect the contents of the carton
For carton marks, packing units and protection details, use the bicycle carton packaging checklist alongside this inspection record.
During bicycle inspection, open selected cartons and compare their contents with the approved packing list. Count pedals, loose fittings, manuals and any model-specific accessories. Check that left/right or model-specific items are identifiable where relevant and that hardware bags remain secured during handling.
Watch for contact between metal parts and painted surfaces. Protection should address the actual packing geometry, including where a loose wheel, handlebar or accessory could move. A photograph showing protective material somewhere in the carton does not prove every vulnerable contact point is covered.
Extend bicycle inspection to the carton label. Verify model, color, quantity, destination marks and the barcode data requested by the buyer. Scan a sample barcode and compare its decoded value with the approved item record; a readable code can still identify the wrong product.
Measure carton dimensions and weight on representative packed units using the agreed method. These figures help reconcile the packing list and freight plan. Review the OEM bicycle packaging checklist before finalizing the order so packaging decisions are settled early.
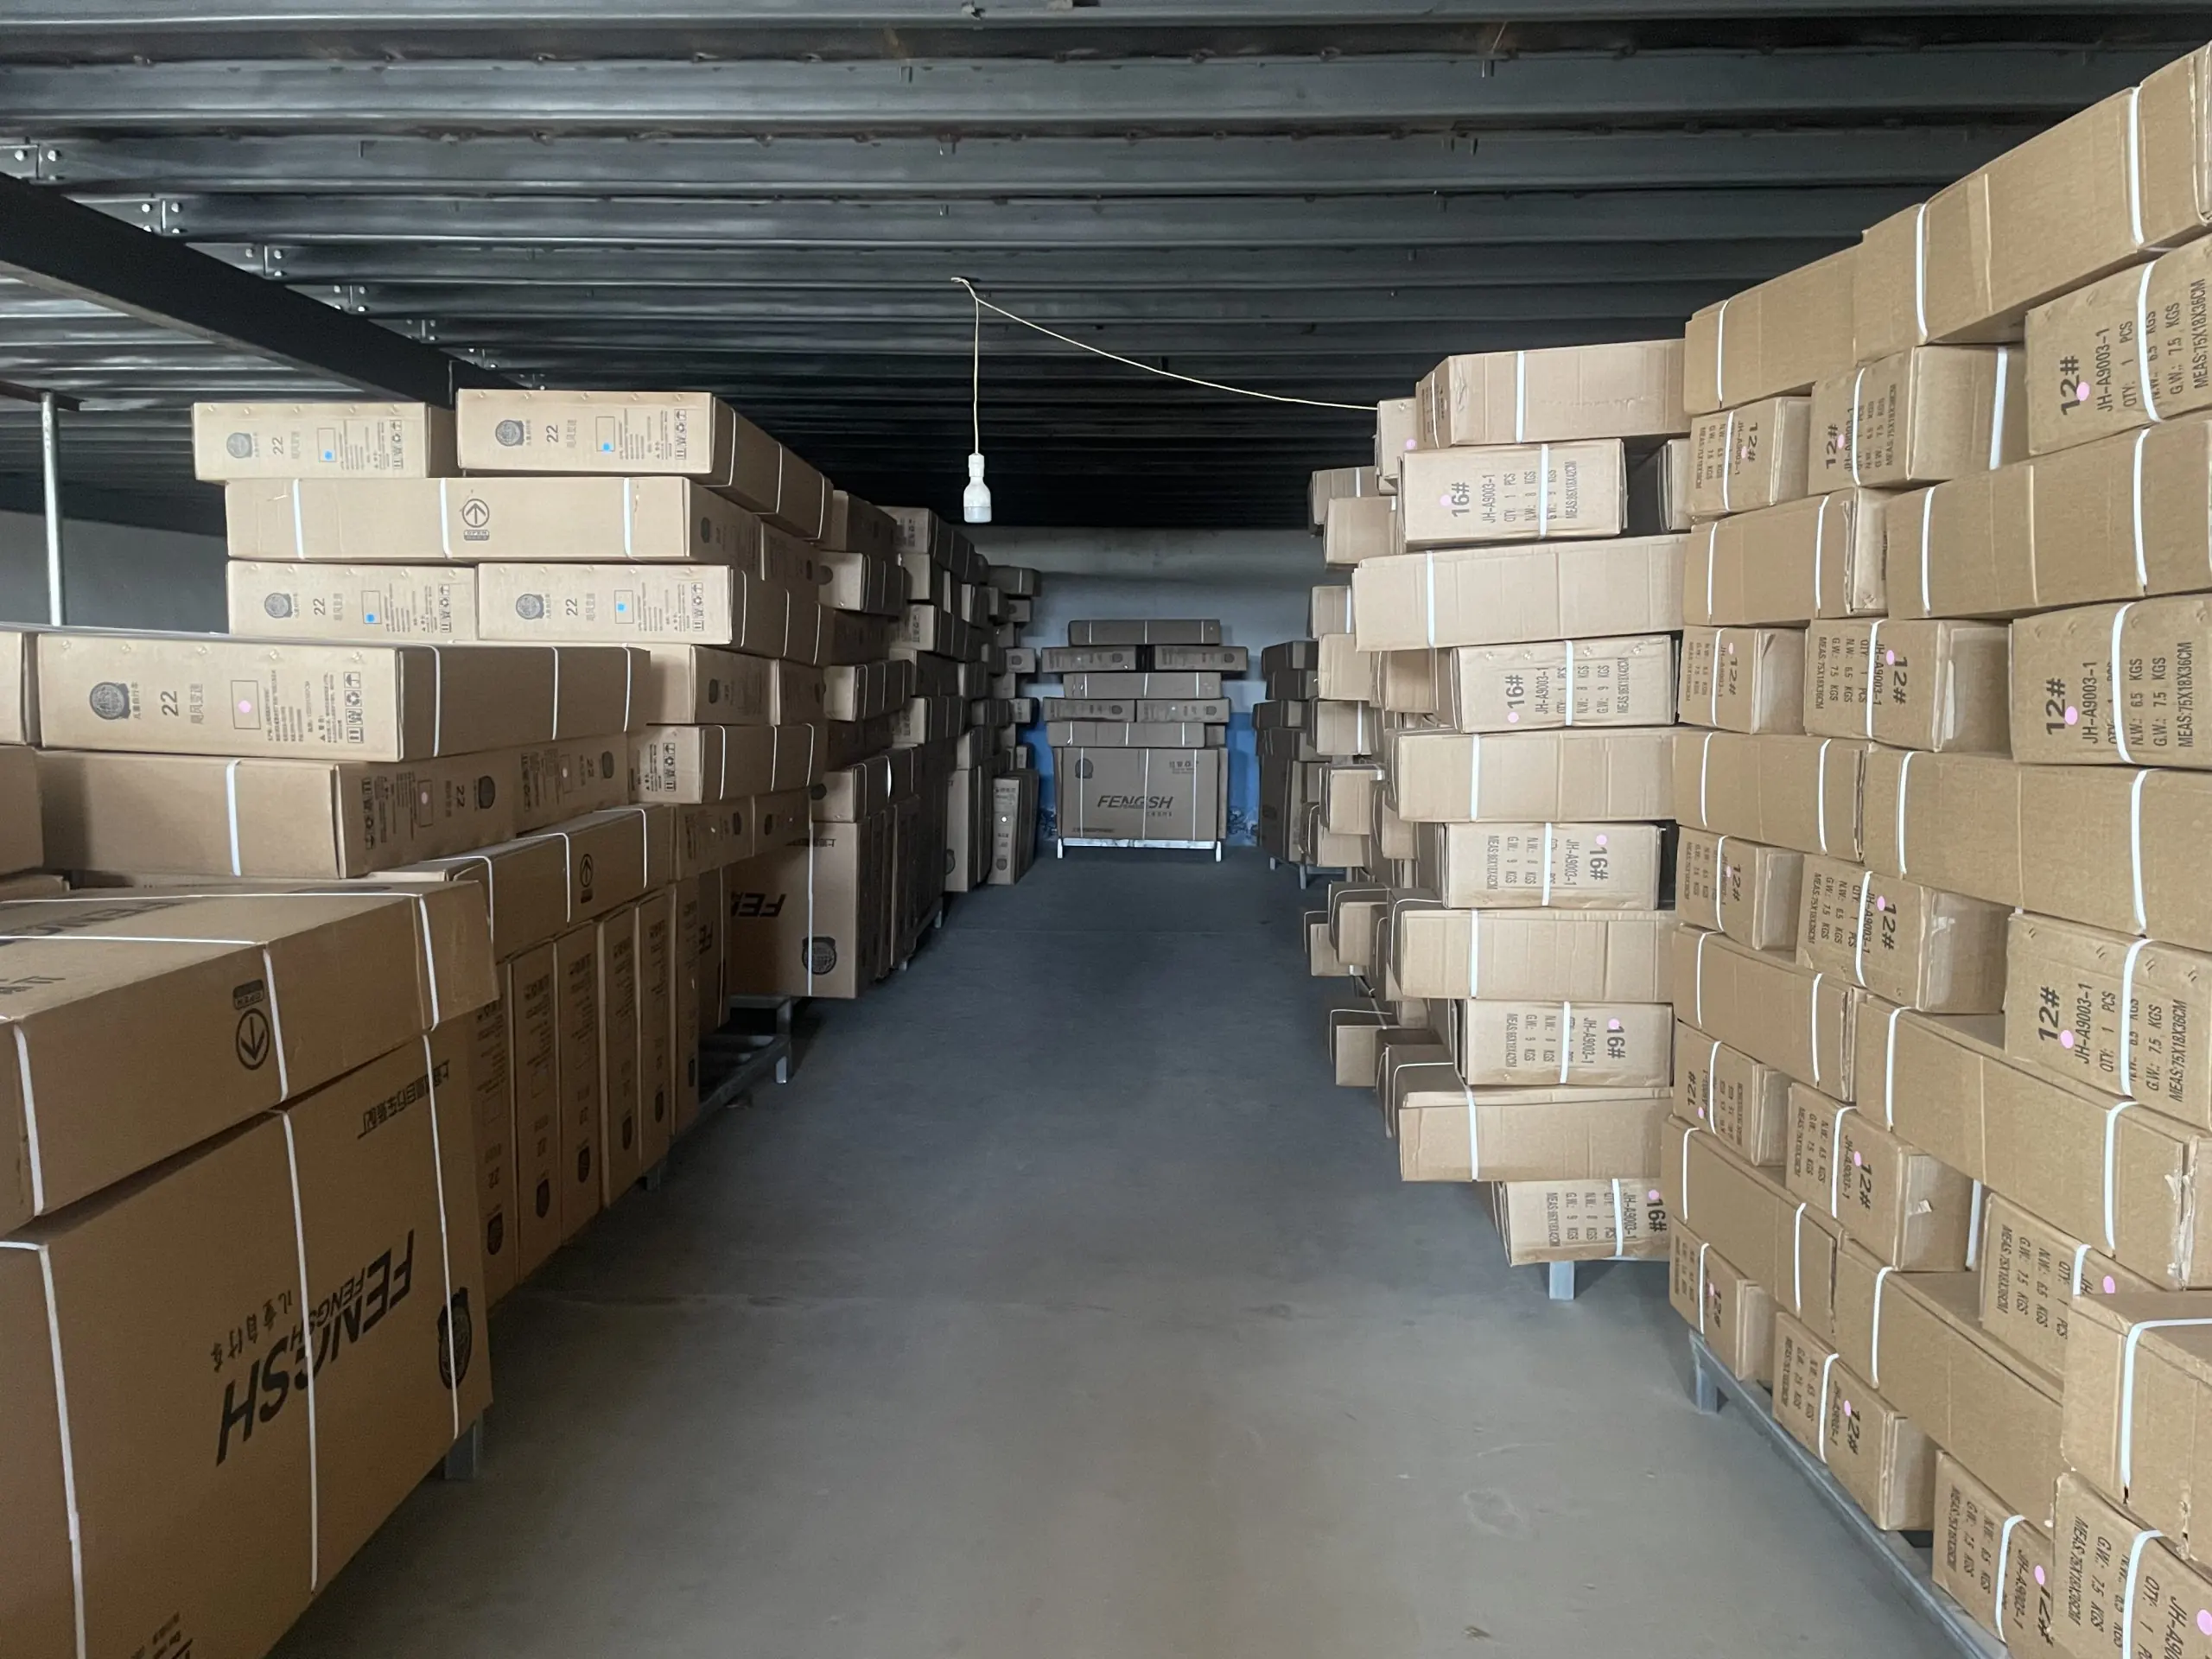
Match carton model and size markings against the order breakdown and packing list.
7. Make defects traceable and close them properly
Give each finding an identifier, sampled-unit reference, photograph and requirement that was not met. Agree critical, major and minor classifications before inspection. A missing decorative item and a safety-related assembly problem should not disappear into one undifferentiated defect count.
Your bicycle inspection report should separate observed facts from the recommended disposition. The inspector records evidence and applies the agreed plan; the authorized buyer decides shipment release within the contract and applicable obligations.
Use a correction log with these fields:
- Finding number and affected model or batch.
- Requirement, observed defect and severity classification.
- Containment and proposed correction.
- Person responsible and completion date.
- Verification evidence and outstanding action.
Correcting one photographed unit is not enough when the same issue may affect the lot. Ask how the affected scope was established, what goods were screened and how the correction was checked. If bicycle inspection finds a significant unresolved problem, keep the affected goods on hold and arrange appropriate reinspection.
8. Connect inspection with after-sales stock
Use confirmed component identities to build the replacement-parts list. Record dimensions, interfaces and model references where needed; a loose name such as “brake part” will not help a service team reorder accurately.
An illustrative allowance of six replacement items for 300 bicycles equals two items per 100 bicycles. That calculation is a budgeting example, not a recommended defect allowance or a forecast of failures. Set quantities from service history, component compatibility, replenishment time and your sales model.
Record spare-part packing locations during bicycle inspection so small cartons are not confused with saleable complete-bicycle units. Keep replacement stock separately identified on the packing documents. The distributor parts procurement checklist helps structure the compatibility information to send with an enquiry.
9. Keep loading evidence separate from quality approval
A passed bicycle inspection report and a loading record answer different questions. The first documents the inspected goods and findings. The second helps establish which goods entered the container and in what visible condition.
Before loading, document the container’s visible interior condition and identify concerns such as moisture, debris, damage or unsuitable surfaces. Have the responsible loading team address these under the agreed shipping requirements. Record the loading sequence, carton counts and shipment references; keep container and seal identification in the private shipment file.
Avoid treating a photograph of closed doors as a complete loading record. Reconcile the final packing list with the goods released for shipment, and resolve substitutions or quantity changes before the documentation is finalized.
10. Use a clear release checklist
Before authorizing shipment, confirm that the bicycle inspection file contains the approved specification revision, identified inspected lots, sampling scope, results, closed corrections and any outstanding limitations. Add the final packing list and the agreed document package.
For budgeting, compare inspection and correction costs with the likely cost of finding a problem at destination. As an illustrative calculation, ten bicycles requiring 30 minutes of correction each create five labour hours before any replacement parts or customer handling. Use your actual labour costs and service records to evaluate the trade-off.
Do not accept “passed” without knowing what was checked. A useful release decision states the shipment reference, authorized decision maker, date and any agreed conditions. Retain the evidence so the next order can use confirmed improvements rather than repeating the same dispute.
Frequently asked questions
Is a supplier’s video enough for bicycle inspection?
A video can support a specific finding, but it does not establish random sample selection, complete lot coverage or compliance with the full inspection plan. Ask which units are shown and request traceable results for the agreed checks.
Does pre-shipment inspection replace product certification?
No. Shipment checks evaluate the goods within an agreed scope. Product safety assessment and market-specific compliance documentation have separate requirements. Confirm the exact product and destination with the appropriate competent provider before ordering.
Who pays if goods fail?
Agree inspection, correction, reinspection and delay responsibilities in the purchase terms. Record the cause and affected scope before negotiating a remedy. Avoid relying on an informal assumption that either party will cover every expense.
What should an importer send BOLUN first?
Send the bicycle category, target market, quantity by model, requested components, branding files and packing requirements. Include your inspection expectations so their feasibility, scope and cost can be discussed before the order is finalized.
Request a quote with your inspection requirements
Build bicycle inspection into the buying brief. Share the model direction, quantities, destination, specification priorities and required shipment evidence with BOLUN. Ask for confirmation of available configurations, packing options and the proposed order process.
Get a Quote / Request Catalog — include your inspection checklist with the enquiry so product and shipment requirements can be reviewed together. Quotes are issued against container quantities and OEM programmes, not single units.
When an inspection finds a difference from the approved build, the sample to production guide covers how the reference sample and substitution rules should settle it.
Where this sits on the site
If you are putting a container together, the pages below carry the model range, the trade terms and the quote form.